Best Way to Clean Dentures: Smart Tips & Mistakes to Avoid
Posted by Ethan Parker on
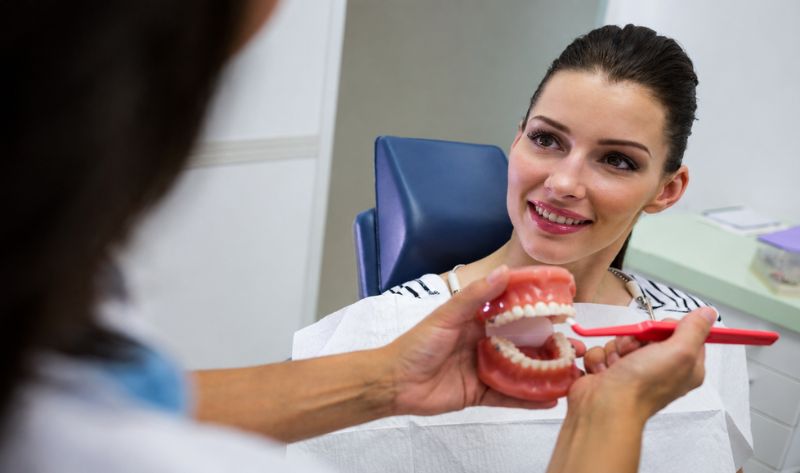
Table of Contents
- Why is Cleaning Dentures Important?
- Best Way to Clean Dentures
- How to Remove Plaque and Tartar From Dentures
- Broken or Chipped Tooth: Repairing Damage Promptly
- Mistakes to Avoid
- Visit a Dentist for Professional Cleaning
- Conclusion
Getting dentures is a life-changing step, one that restores your confidence, your smile, and your ability to eat comfortably. But here is something many new denture wearers do not fully appreciate until problems arise, dentures need just as much care as natural teeth, if not more.
Without a proper cleaning routine, bacteria, plaque, and fungal organisms quietly build up on your dentures every single day.Unfortunately, the problems do not end there. Neglected dentures can cause mouth sores, gum infections, and a condition called denture stomatitis, a persistent inflammation of the oral tissues that affects a surprising number of denture wearers.
The good news is that keeping your dentures clean does not require expensive products or complicated routines. It requires consistency, the right technique, and an understanding of what actually works.
Why is Cleaning Dentures Important?
Before getting into the how, it is worth understanding the why, because when you understand what is actually happening inside your mouth, the motivation to clean properly becomes much stronger.
Bacteria and Biofilm Accumulation
Your mouth is home to hundreds of species of bacteria. When dentures sit in your mouth throughout the day, a thin layer of biofilm, essentially a structured community of bacteria, begins forming on every surface. Left undisturbed, this biofilm hardens into plaque, which is much more difficult to remove and provides a foothold for more harmful organisms.
The Risk of Oral Infections
One of the most common problems of poor denture hygiene is oral candidiasis, a fungal infection caused by Candida albicans. This organism thrives on denture surfaces, particularly the tissue-facing side that rests against your gums. Symptoms include redness, soreness, and a burning sensation in the mouth. In some cases, the infection spreads to the corners of the lips, a condition called angular cheilitis.
Gum and Bone Health
Even without natural teeth, your gums and the underlying bone still require protection. Bacterial toxins from unclean dentures irritate gum tissue directly, potentially hastening bone resorption, the gradual shrinkage of the jaw bone that changes how dentures fit over time.
Best Way to Clean Dentures
Developing the right cleaning routine is the single most effective thing you can do for your denture hygiene. Here is a thorough, practical process that covers every aspect of proper denture care.
Step 1: Prepare Your Bathroom
Before you do anything else, set yourself up for success. Place a folded towel or a small basin of water in your sink. This is not a trivial step, dentures are surprisingly fragile, and a single drop onto a hard porcelain surface can crack or chip the acrylic. The towel or water basin acts as a cushion if the denture slips from your hands.
Keep your cleaning supplies within reach, a soft-bristled denture brush (or a soft regular toothbrush), non-abrasive denture cleaner or mild hand soap, and a clean container for soaking.
Step 2: Use Warm Water to Loosen the Denture
If you use denture adhesive, start by rinsing your mouth with warm water before removing the denture. The warmth helps soften the adhesive bond, making removal easy and more comfortable. Swishing warm water around your mouth is also helpful if the denture feels particularly secure that day.
Do not use hot water at any point in this process. Denture acrylic can warp under high temperatures, gradually altering the fit and making your dentures uncomfortable to wear.
Step 3: Take Out Your Dentures
Remove dentures carefully and slowly. Upper dentures should be removed by pressing both thumbs against the front teeth and pushing upward and outward to release the suction. Lower dentures respond best
If removal feels painful or unusually difficult, do not force it. This can sometimes indicate a change in fit that warrants a visit to your dental professional. Forced removal risks damaging both the false teeth and your gum tissue.
Step 4: Rinse Your Denture
Hold the denture under a gentle stream of cool or lukewarm running water immediately after removal. This initial rinse dislodges loose food debris, saliva, and surface bacteria before you begin brushing. Think of it as the equivalent of pre-rinsing dishes before washing them, you are removing the bulk of the debris so your cleaning effort is more effective.
Pay attention to the tissue-facing surface of the denture during rinsing. This area traps food particles and adhesive residue more readily than the outer surfaces.
Step 5: Brush Your Denture
This is the most critical step in your entire cleaning routine. Apply a small amount of non-abrasive denture cleaner, mild dish soap, or liquid hand soap to your denture brush. Do not use regular toothpaste. This is a common mistake that causes significant damage over time. Regular toothpaste is formulated with abrasive particles meant to polish natural enamel, but those same particles are far too harsh for denture acrylic and leave behind tiny scratches where bacteria take hold.
Brush every surface systematically:
- The outer (cheek-facing) surface of the teeth
- The inner (tongue-facing) surface
- The chewing surfaces
- The tissue-facing (gum-resting) surface
Avoid pressing too hard as you brush. You need enough pressure to lift and remove plaque, but excess force risks damaging the acrylic surface or distorting metal clasps with repeated use.
Step 6: Remove Adhesive Residues From Your Mouth
After removing and rinsing your dentures, turn your attention to your mouth itself. If you use denture adhesive, there will be residue left on your gums and palate that needs to be cleared away.
Use a soft, damp cloth or a soft-bristled toothbrush to gently wipe your gums, the roof of your mouth, your tongue, and the inside of your cheeks. This step serves two purposes.
- It removes adhesive residue that would otherwise accumulate and harden
- It stimulates circulation in your gum tissue, something that benefits the underlying bone and tissue health significantly.
Stubborn adhesive responds well to a warm water swish before wiping, it softens the residue and makes removal far less effortful. That said, always wipe with a light touch. Gum tissue is sensitive by nature, and that sensitivity only increases with long-term denture use.
Step 7: Soak Dentures Overnight
Most dentures need to remain moist to retain their shape. Acrylic dentures, in particular, can dry out and warp if left exposed to air for extended periods. Soaking overnight solves this problem while simultaneously providing deeper cleaning than brushing alone can achieve.
Place your dentures in a clean container filled with either plain cool water or a denture-soaking solution. Effervescent denture tablets, when dissolved in water, release cleaning agents that penetrate areas your brush cannot easily reach and help loosen calculus deposits.
A few important guidelines for soaking:
- Use cool or room-temperature water, never hot
- Change the soaking solution every night; do not reuse it
- If your dentures have metal components, check the soaking product’s label.
- Keep the container covered to prevent contamination
Step 8: Rinse Again Before Wearing
Before putting your dentures back in the following morning, rinse them thoroughly under running water. This step is non-negotiable if you use a commercial soaking solution, as these products contain chemicals that should not be ingested or left in contact with oral tissues.
A quick but thorough rinse ensures that you are placing a genuinely clean denture into your mouth, rather than one that carries residual cleaning agents.
How to Remove Plaque and Tartar From Dentures
Brushing daily goes a long way, but it cannot stop minerals in your saliva from slowly depositing on your dentures. These deposits tend to gather most heavily along the gum line and around the clasps of partial dentures.
For Light Plaque Buildup
White vinegar is a surprisingly effective home remedy for light mineral deposits. Mix equal parts white vinegar and warm water and soak your dentures for 20 to 30 minutes. The mild acidity helps dissolve early-stage calculus without damaging acrylic. Follow with thorough brushing and rinsing.
For Moderate Buildup
Making denture-cleaning tablets part of your nightly routine is one of the easiest ways to manage moderate plaque and stain buildup before it becomes a bigger problem. Stick to products containing sodium bicarbonate, citric acid, or sodium perborate, these ingredients are both safe for acrylic dentures and backed by solid research.
For Stubborn Tartar
If you run your tongue across your dentures and feel hard, rough patches that brushing cannot remove, do not reach for a sharp tool. Scraping denture acrylic with a knife or nail file scratches the surface and creates conditions that speed up future deposits, it is a short-term attempt that causes long-term damage. Your dentist or prosthodontist is equipped to handle calculus professionally, using ultrasonic devices and clinical solutions that clear it away safely and thoroughly.
Mistakes to Avoid
Even well-intentioned denture wearers commonly make mistakes that compromise both the cleaning of their dentures and the health of their mouths. Being aware of these mistakes is the first step toward avoiding them.
Using Regular Toothpaste
As mentioned, conventional toothpaste is abrasive enough to scratch denture acrylic. Over time, these scratches become breeding grounds for bacteria and stains. Always use products specifically formulated for dentures.
Sleeping With Dentures
Wearing dentures 24/7 denies your gum tissue the rest it needs. The pressure of dentures on gum tissue, when sustained for 24 hours without relief, hastens bone resorption and greatly increases the risk of oral infections. Remove dentures every night.
Skipping the Mouth Cleaning
Cleaning your dentures without also cleaning your mouth leaves the job only half done. Bacteria and adhesive residue left on gum tissue will simply transfer back to your clean dentures the moment you put them in.
Using Hot Water
Hot water warps acrylic. Room temperature or cool water should be used for all rinsing and soaking.
Dropping Dentures on Hard Surfaces
Denture acrylic chips and cracks easily. Always work over a soft surface or water-filled basin. Even a small crack compromises the structural integrity of the denture and creates additional surface area where bacteria can hide.
Ignoring Changes
If your dentures begin feeling loose, uncomfortable, or if you notice sore spots that do not resolve within a day or two, consult your dentist. Dentures that no longer fit properly cause more damage to gum tissue than most people realize, and attempting to compensate with excessive adhesive is not a solution.
Visit a Dentist for Professional Cleaning
No matter how thorough your home cleaning routine is, there are certain things that only a professional can address. Plaque that has hardened into calculus, stubborn stains that have worked their way deep into the acrylic, and early signs of damage that go unnoticed without a trained eye, these are all things that a professional cleaning appointment at H & A Dental can identify and resolve. Our team uses professional-grade ultrasonic cleaning equipment and clinical solutions that reach areas your brush and soaking routine simply cannot. The result is a level of cleaning that home care alone cannot match, and a pair of dentures that look, feel, and fit the way they should.
Professional cleaning appointments also give the team an opportunity to check the overall condition of your dentures. Small cracks, worn surfaces, and early fit changes are far easier to address when caught early. Leaving them unattended almost always leads to bigger problems down the line, and bigger costs.
Most denture wearers benefit from a professional cleaning every six months, though your denture clinic specialist may recommend a different schedule based on your individual needs and the condition of your dentures.
Conclusion
Proper denture cleaning is not complicated, but it does require daily commitment and the right approach. The steps outlined in this guide are straightforward, rinse, brush with appropriate products, clean your mouth, soak overnight, and rinse again before wearing.
Followed consistently, this routine forms the foundation of good denture hygiene. Beyond the daily routine, stay proactive about professional cleanings, watch for signs of infection or changes in fit, and resist the shortcuts that seem harmless but cause real damage. Your dentures represent a significant investment in your quality of life.
Treating them with the same dedication you would give natural teeth means they will serve you better, last longer, and keep your mouth healthier for years to come. If you ever have concerns about your denture care routine or notice changes in your oral health, do not hesitate to speak with H & A Dental. We are your most reliable resource for guidance tailored to your specific situation.

Ethan Parker writes and reviews content on denture treatments and denture care, focusing on accuracy and clarity to make information easy to understand.
Other Relevant Posts

Why are My New Dentures Loose? Problems & Solutions
There are few things more frustrating than getting brand new dentures, only to find they feel loose, wobbly, or…